Much ado about scripting, Linux & Eclipse: card subject to change

2019-07-25

Deploying Che 7 with custom images (air gap environment)

2019-07-19

Configuring Minishift for use with Eclipse Che and Red Hat CodeReady Workspaces

Number 4 in my Che series... a quick guide for using Minishift, in order to test drive Che 7 or Red Hat CodeReady Workspaces.

If you're not running Windows as your host OS, your mileage may vary in terms of memory requirements and preferred virtual machine driver, but the suggestions below should work on most OSes... even the one with an incomplete sed implementation.

Get Minishift and oc

Download and unpack the latest minishift v1.34.1 binary from here:
You’ll also want the Openshift Origin Client Tools (oc) 4 or 3.11 from:

Once downloaded and unpacked, put the minishift and oc executables in your ~/bin or some other folder that’s on your PATH.

Configure Minishift

On Windows, I use Git bash shell for most shell commands.
# To prevent rate limiting when starting minishift, use a personal 
# access token.
# You can create new one at https://github.com/settings/tokens
export MINISHIFT_GITHUB_API_TOKEN="f00cafebabel33t"

# Grant enough memory to run CRW 1.2 / Che 6 and workspaces
# 6G min for one workspace, plus 2G for each additional workspace
minishift config set memory 12G

# Grant enough disk for downloading container images
minishift config set disk-size 25G

# if not using default virtualization engine, eg., want Virtual Box, use
minishift config set vm-driver virtualbox

# enable cluster admin user
minishift addons install --defaults
minishift addons enable admin-user
On Windows, you might need to touch a file that your shell can’t find.
touch /c/Users/YOUR_LOGIN_HERE/.minishift/machines/minishift_kubeconfig
Note      
If it fails with error Checking if requested OpenShift version 'v3.11.0' is valid …​ v3.11.0 is not a valid OpenShift versionFAIL, try WSL bash.
# start minishift oc cluster
minishift start
Once minishift starts successfully, you’re ready to deploy Che or CRW to the server.

If minishift fails to come up, try killing and starting it again:
minishift stop
minishift start
Or delete it and try again:
minishift stop
minishift delete
minishift start
When successful, you should see something like this (use your actual IP address in place of 192.168.$YOUR_IP):
OpenShift server started.

The server is accessible via web console at:
    https://192.168.$YOUR_IP:8443/console
You can log into the above console URL using the special user = system:admin - full cluster admin privileges required to deploy an operator:
oc login 192.168.$YOUR_IP:8443 -u system:admin
If you prefer to use a different user, you can grant that user cluster admin privileges:
oc adm policy --as=system:admin add-cluster-role-to-user cluster-admin admin # for admin user
oc adm policy --as=system:admin add-cluster-role-to-user cluster-admin developer # for developer user

Deploy something!

If you want to install CodeReady Workspaces 1.2, download the Operator Installer from here:

Set up your authentication with the new Red Hat Container Catalog's registry, registry.redhat.io:

Run the installation as follows:

./deploy.sh -d
Or, if you'd like to install Che 7, see Deploying Che 7 to Minishift.

You can also use the built-in Che add-on in Minishift, but that approach is deprecated. Enable it as follows:

minishift addons enable che; minishift addons apply \
  --addon-env CHE_DOCKER_IMAGE=eclipse/che-server:nightly \
  --addon-env OPENSHIFT_TOKEN=$(oc whoami -t) che

# switch to Che 7.0.0.RC3 plugin registry format (fixed in minishift v1.34.1) 
# see https://github.com/minishift/minishift/commit/4c0a0c0b9cfb92798fef53e5c54e80ca71c5f715
minishift --profile che addons apply --addon-env PLUGIN__REGISTRY__URL=https://che-plugin-registry.openshift.io/v3 che

2019-07-04

Creating your own devfile registry

Third in this series... how to create and deploy your own custom devfile registry, so you can include your own stacks out of the box inside Che 7.

Creating your own devfile registry

Prerequisites

You need a Kubernetes or OpenShift cluster (eg., minikube or minishift), into which you have installed Che. Follow the steps in this document to deploy Che.
Steps below can then be done to deploy a custom devfile registry to your cluster, and use it with Che.

Procedure

  1. git clone https://github.com/eclipse/che-devfile-registry/
    cd che-devfile-registry
  2. Make changes in the devfiles/ folder to add new or remove existing devfile folders from the registry.
  3. Build the image.
    This example uses a personal quay repository and an arbitrary tag ubi8-2, but you can use another image registry and path as needed.
    docker build . -f Dockerfile --no-cache \
      -t quay.io/nickboldt/che-devfile-registry:ubi8-2
  4. Push it to quay (or your image registry of choice)
    docker push quay.io/nickboldt/che-devfile-registry:ubi8-2
    Verify the image and tag you pushed are published, eg.,
    Verify the Repository Visibility is public, eg.,
  5. Remove any existing che-devfile-registry deployments.
    oc delete dc che-devfile-registry; \
    oc delete svc che-devfile-registry; \
    oc delete route che-devfile-registry; \
    sleep 5s
  6. Deploy the new che-devfile-registry.
    oc new-app -f deploy/openshift/che-devfile-registry.yaml \
      -p PULL_POLICY="Always" \
      -p IMAGE="quay.io/nickboldt/che-devfile-registry" \
      -p IMAGE_TAG="ubi8-2"; \
    sleep 5s
     
  7. You can browse the registry’s devfiles/index.json file to verify your new devfile is included.
  8. Update your config map to point to the new registry.
    oc set env dc/che CHE_WORKSPACE_DEVFILE__REGISTRY__URL=http://che-devfile-registry-che.192.168.99.112.nip.io/
  9. Check your Che deployment to see if the changes are live by creating a new workspace from your devfile registry:

    2019-06-29

    Discovering containers loaded by Che 7

    Second in this series... more tips for Che 7 on Minishift.

    Discovering containers loaded by Che 7

    Prerequisites

    You need a Kubernetes or OpenShift cluster (eg., minikube or minishift), into which you have installed Che.
    Follow the steps in this document to deploy Che. Steps below can be done in parallel to collect a list of containers involved in deployment.

    Procedure

    1. Once you have started your cluster, you can watch events and see which images are pulled. Start this in a console window before deploying Che to your cluster.
      oc project che
      oc get po
      oc get events -w | tee /tmp/minishift.log.txt
    2. Watch for lines containing the following lines to see what containers are pulled.
      Successfully pulled image "..."
        and
      Container image "..." already present on machine
    3. For example, this should extract just a list of pulled containers, including any duplicate re-pulls:
      cat /tmp/minishift.log.txt | \
        egrep "Successfully pulled image|Container image" | \
        sed -e 's#.*\(Successfully pulled image\|Container image\) "\(.\+\)\".*#\2#g'
    4. You can also look at the available images in the minishift docker context:
      eval $(minishift docker-env)
      docker images
    5. Next, using chectldeploy Che to your cluster and watch the events get logged.
    6. You can also see container events at this URL:
      • https://192.168.YOUR.IP:8443/console/project/che/browse/events

    Deploying Che 7 to Minishift with chectl

    With the Che 7 just around the corner, and the realisation that I miss writing, I've decided to resurrect this blog from the dead and start a series of Che 7 tips. 

    First up, the handful of steps required to get Che 7 running on Minishift 1.34 (OKD 3.11).

    ----

    Deploying Che 7 to Minishift with chectl

    Prerequisites

    You need the latest Minishift and chectl releases.
    Fetch them like this (or similar):
    cd ~/bin
    curl -sSL https://github.com/che-incubator/chectl/releases/download/20190724230954/chectl-linux -o chectl
    chmod +x chectl
    cd /tmp
    curl -sSL https://github.com/minishift/minishift/releases/download/v1.34.1/minishift-1.34.1-linux-amd64.tgz -o minishift.tgz
    tar xvzf minishift.tgz
    mv minishift*/minishift ~/bin/
    chmod +x ~/bin/minishift

    Procedure

    1. Start up minishift. (See Start up Minishift for some suggested default settings.)
      minishift start
    2. Log in once startup is complete. NOTE: you need cluster admin priviledges.
      oc login 192.168.MY.IP:8433 -u system -p admin
    3. To watch the events and see which images are pulled, see this document.
    4. Deploy Che to minishift using the operator:
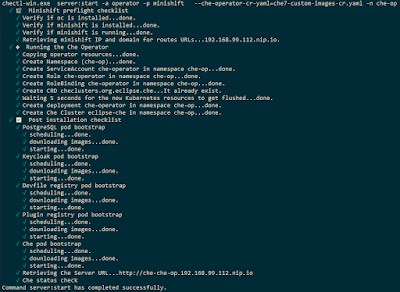
      chectl server:start -a operator -p minishift -n che
    5. If using Fix the plugin registry URL to use the latest version:
      oc set env dc/che CHE_WORKSPACE_PLUGIN__REGISTRY__URL=https://che-plugin-registry.openshift.io/v3
      You can also use the -a minishift-addon approach to deploy che, which uses a deployment configuration instead of an operator. However, this approach is deprecated as it does not support using a custom resource (eg., for air gap deployments).
      Also, if using Minishift 1.34.0 or earlier with the minishift-addon, you must fix the plugin registry URL to use the latest version:
      oc set env dc/che CHE_WORKSPACE_PLUGIN__REGISTRY__URL=https://che-plugin-registry.openshift.io/v3
      You can open the console for the che minishift-addondeployment to verify your change has been applied:
      You should see:
      CHE_WORKSPACE_PLUGIN__REGISTRY__URL = https://che-plugin-registry.openshift.io/v3
    6. Wait for redeployment to complete.
    7. Once running, you can see your Che instance here:
      • http://che-che.192.168.YOUR.IP.nip.io/
    8. If you then add a new workspace, you can see even more images pulled in the openshift event log.